Air-dried cashew-millet cheese, geotrichum culture
| Tags: | Gluten free, Soy free |
|---|---|
| Time: | Preparation time , cooking time , total time |
| Serves: | 2 small cheeses |
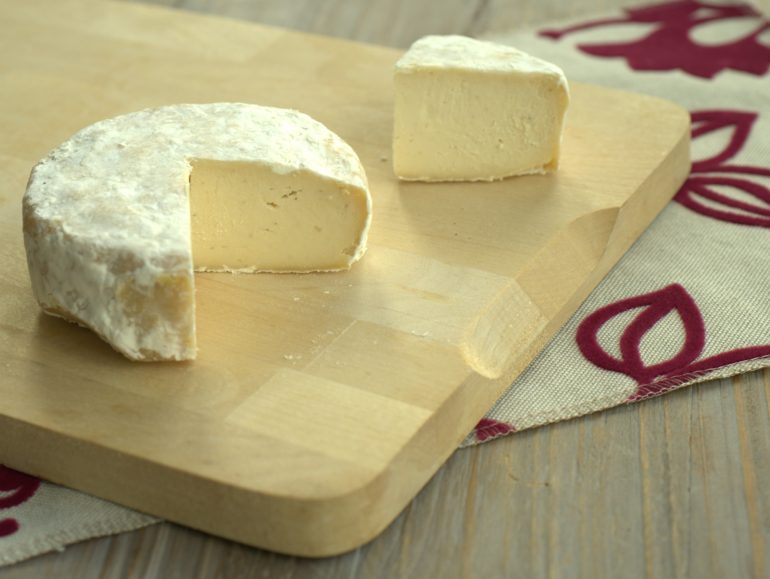
This is hands down the tastiest vegan cheese I've ever tried, bought or home-made! It is firm and creamy at the same time and has a lovely full goat-ish flavor. It tastes great in sandwiches or salads, but it really shines as part of a cheese platter where you can taste it on its own. It can also be used on pizza's and in casseroles.
This is not a low carb cheese (that's becoming a bit of a tradition, sorry low carb friends, I'll make some nice cheeses for you soon!). The ingrediënts are cashews and millet, which I ferment with lactobacilli and geotrichum candidum culture from the Cashewbert webshop (they're opening again October 9). The geotrichum gives this cheese a very deep and unique flavor. You can leave it out or substitute another fungus culture if you want, but the taste will be different.
This method of air-dried cheese-making that combines nuts and grains, with of starch on the outside of the cheese was inspired by Connie's RAWsome kitchen on Youtube. She makes spectacular vegan cheeses and seitan. Definitely check her out if you are into kitchen experiments!
The flavor of the cheese will become stronger as it ages. After 4-5 weeks it already has a really nice rich taste, but I want to try and age it longer to see how the flavor develops.
Ingredients
- 1/4 cup millet or basmati rice
- 1/2 cup water
- 1 cup unroasted cashew nuts
- 2 tablespoons neutral flavored coconut oil, melted
- 1-2 tablespoons (shiro) miso
- 1 tablespoon vegan yogurt or a probiotic capsule (or leave this out and replace the water with rejuvelac)
- 1 dessert fork tip of geotrichum candidum powder (optional)
- 1/2 cup water, or slightly more if the mixture is too dry for blending
- 1/2 teaspoon seasalt + extra
- Cornstarch, tapioca starch or potato starch
- Wood ash for food purposes (optional, see variation)
Instructions
Make the cheese mixture
Put the millet in a small pot with the 1/2 cup of water. Bring to a boil, cover with a lid and simmer for 15 minutes untill the millet is soft and the water has been absorbed. In the mean time, also boil the cashews for 10 minutes in a generous amount of water so they get soft and any unwanted fungi spores are killed. Let the millet and cashews cool to room temperature.
Add the cooked millet, cashews, coconut oil, miso, yogurt, geotrichum candidum, water en salt to the mixing bowl of your blender or foodprocessor. Blend into a smooth mass, while adding as little extra liquid as possible.
The fermentation
Transfer the cheese mixture to a plastic or glass container and let it ferment for about 24 hours. Bubbles will form and the mixture will get a slightly yeasty smell and sour flavor. It will not taste very good at this point, but that will improve with aging. Stir the cheese to release the air bubbles and refrigerate overnight so it can firm up.
Now it's time to shape the cheese. Cover your work surface with plastic wrap and put a generous amount of corn starch on it. Scoop half of cheese mixture onto the cornstarch and sprinkle more cornstarch on top. Use the plastic wrap and your hands to shape the cheese into a little wheel.
Cut a ribbon of parchment paper and roll it around the cheese to keep the edges nice and straight. Fasten it with a piece of string. Transfer the cheese to a small piece of parchment paper so it is easier to move around. Repeat these steps with the other half of the cheese mixture, so you get two small wheels.
The drying
Cover the bottom of a plastic container with two layers of paper towel and put the cheeses with their parchment paper on top. Cover the cheeses with another two layers of paper towel and put them in the fridge to dry. Do not cover with a lid, because that will prevent proper drying.
Allow the cheeses to dry and ripen in the fridge for four to five weeks. Turn them over every day. Sprinkle them with a little salt the first time you turn them. If you want, you can do this again later for a saltier cheese. Take care to work cleanly and wash your hands before touching the cheeses. Replace the towels and parchment paper if they start to get very wet (or switch the top and bottom ones, so they can dry).
After a few days, the cheese will be firm enough that you can remove the parchment paper around that is tied around the edges. Keep the parchment paper underneath the cheese though, to prevent it from sticking to the towel. A thin layer of white mold may start to grow on the cheese (this is the geotrichum), but it can be hard to tell because of the starch. You should not have other colors of mold such as pink, orange, black or blue.
After four to five weeks the cheese is ready for a first tasting. If you want, you can also try to age it longer so the flavors become even stronger. Once cut, the cheese will keep for another 2-3 weeks. Store it in a closed container.
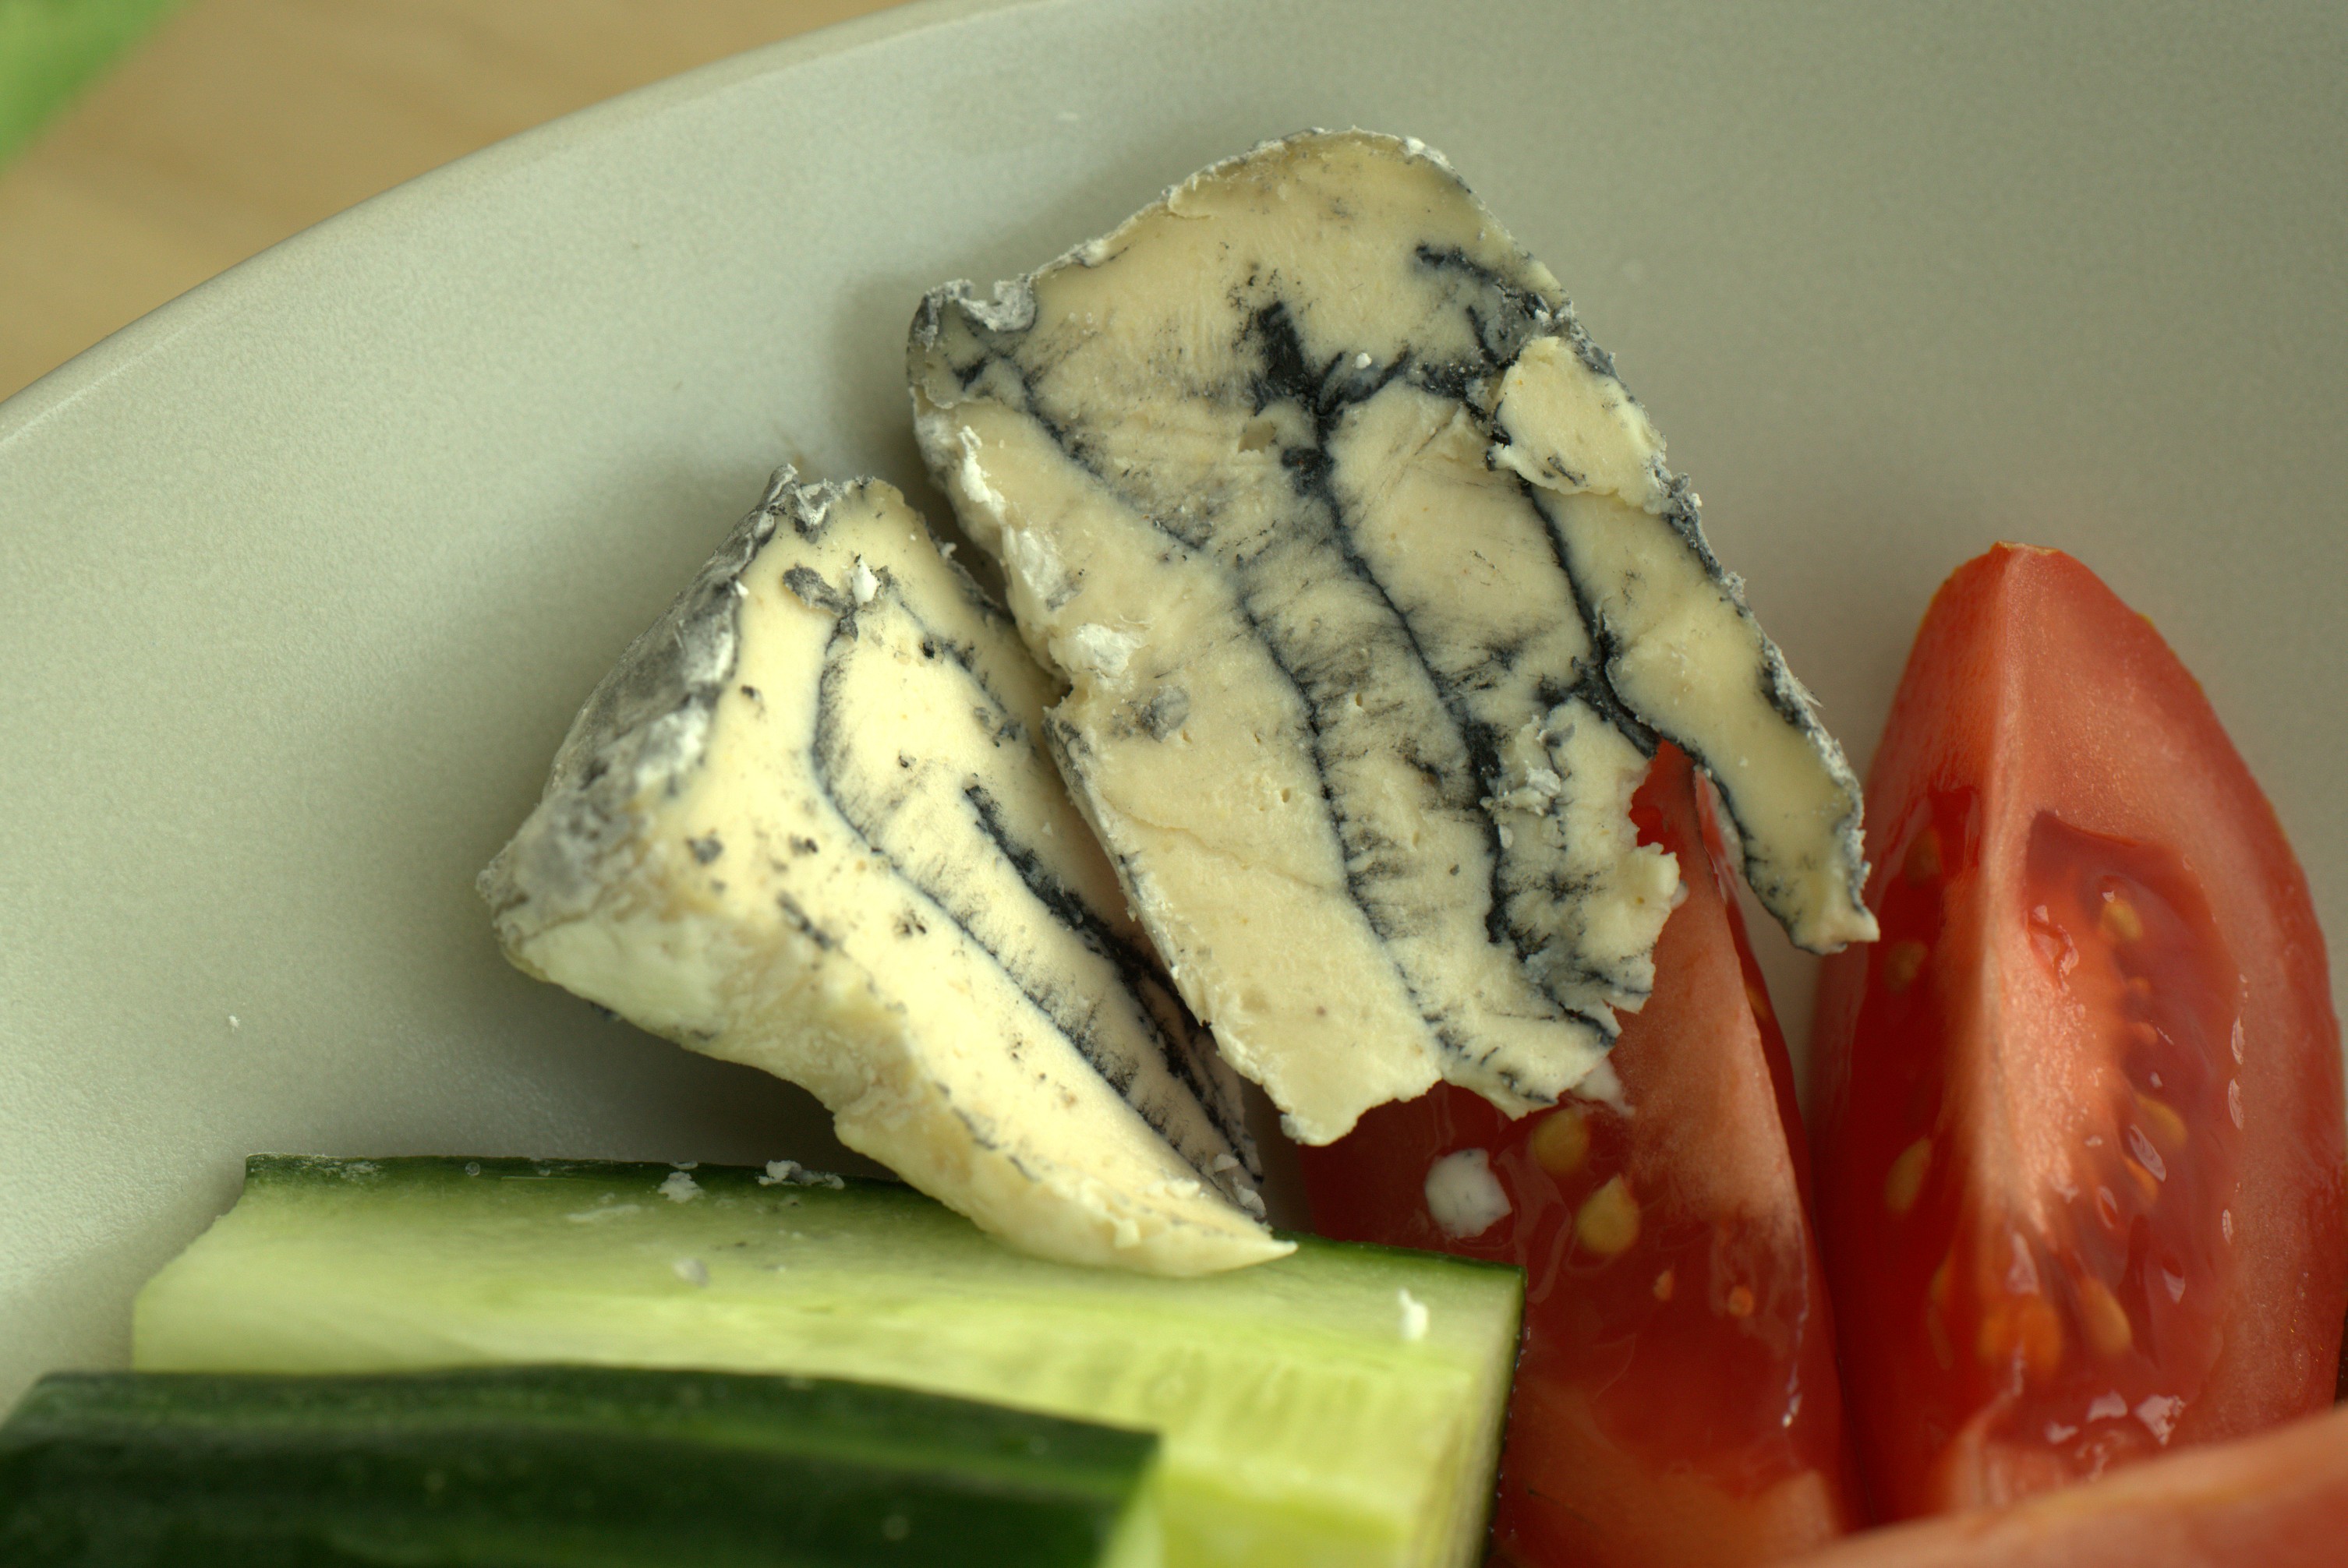
Variation: ash cheese
If you have wood ash for food purposes (also available from Cashewbert), you can sprinkle this on the cheese layers during shaping to get a marbled look. This looks awesome, but I don't find it adds a lot of flavor.
21 comments
Wow, looks and sounds delicious! Thanks for sharing the recipe and detailed instructions. Hope to try this soon.
Hello, I am a long-time vegan who has recently gone low-carb. I just wanted to let you know that this website is a life-saver, and I really appreciate the work you're doing here!
Hi Sarah, that's great to hear! I'll try to post some new recipes soon. Good luck with your low-carb journey!
I love a new vegan cheese from Field Roast called "chao" that uses fermented tofu as its flavoring. Any chance you might have a DIY recipe for that? I could be a recipe tester if you do that! Also, if you send out emails about your upcoming recipes, please put me on your list. Thank you, Anna
Hi Anna, my steamed rice cheese comes closest to the texture of chao. You could easily add some fermented tofu to it. I'm afraid I do not have a mailing list. https://lowcarb-vegan.net/vegan-steamed-rice-cheese/
THIS looks like magic!! What! Thank you so much for offering these recipes to us - you are seriously providing a valuable resource. I can not wait to try this recipe next week!
Thank you so much Katie!
This recipe looks like it would be very yummy, however it is not soy-free as the tags imply. Do you have an alternate version that does not contain the miso? We have soy allergies in hour home so it is always a challenge to find soy free vegan alternatives.
Hi Adri, you could try if you can find soy free chickpea miso. If you can't find it, leave the miso out and add a little extra salt to compensate. It will still be tasty because most of the flavor in this cheese comes from the geotrichum.
Hi Martine! Really enjoying your site, thank you for all the hard work! I am wondering...is the combo of nuts and grains for flavour or structure or both or something else? I hadn't heard of including millet or other grains with the cashews before. I'm intrigued!
Thank you Julia! I wanted to try something different with this cheese. Using part grains cuts some of the cost. And I really enjoy the taste and texture that a grain base brings to my cheeses (also see my rice cheese recipe).
Thank you for this amazing recipe. I've just put my 2 cheeses into a box in the frdige. I added charcoal to one and left the other 'plain'.
Thanks Helen, enjoy your cheese!
Hello! Thanks so much for the recipe. Im having issues with the mould, doesnt seem to grow the clean white thin rind and instead there are random sizes of black thin furry spots surrounded by a bit of white, and in some areas a bit of light pinkish spots too. Seems like something is not working. Im aging them in a wine fridge at 13C, hope you can help! Thanks
Hi Albert, I'm sorry you're having problems with the mold. Black and pink spots are definitely not good and can cause food poisoning! I'm afraid your cheese has spoiled. It has probably been contaminated somehow. When that happens, there isn't really something you can do. If you want to try again, make sure to salt the exterior of the cheese really well, and keep everything that touches it very very clean, including your hands.
At which point do you salt the outside? I read the recipe a few times But cannot see it. Thank you!
Hi Milly, the salting happens after shaping and before the long fermentation.
What is a dessert fork tip? What unit of measure is this please.
Hi Rafa, this is like a 1/16 teaspoon. Or half of a 1/8 teaspoon.
What temperature does the room need to be for fermenting the cheese?
Hi Rafa, this cheese ferments best at a low temperature, between 7 and 14 C.
Write a comment